
REUSE - Lesson Part Resources
Add a resource to a lesson
In the Lessons tab, select Create a lesson part.
Select Resource from the Lesson Part list in the Lesson Part Type window.
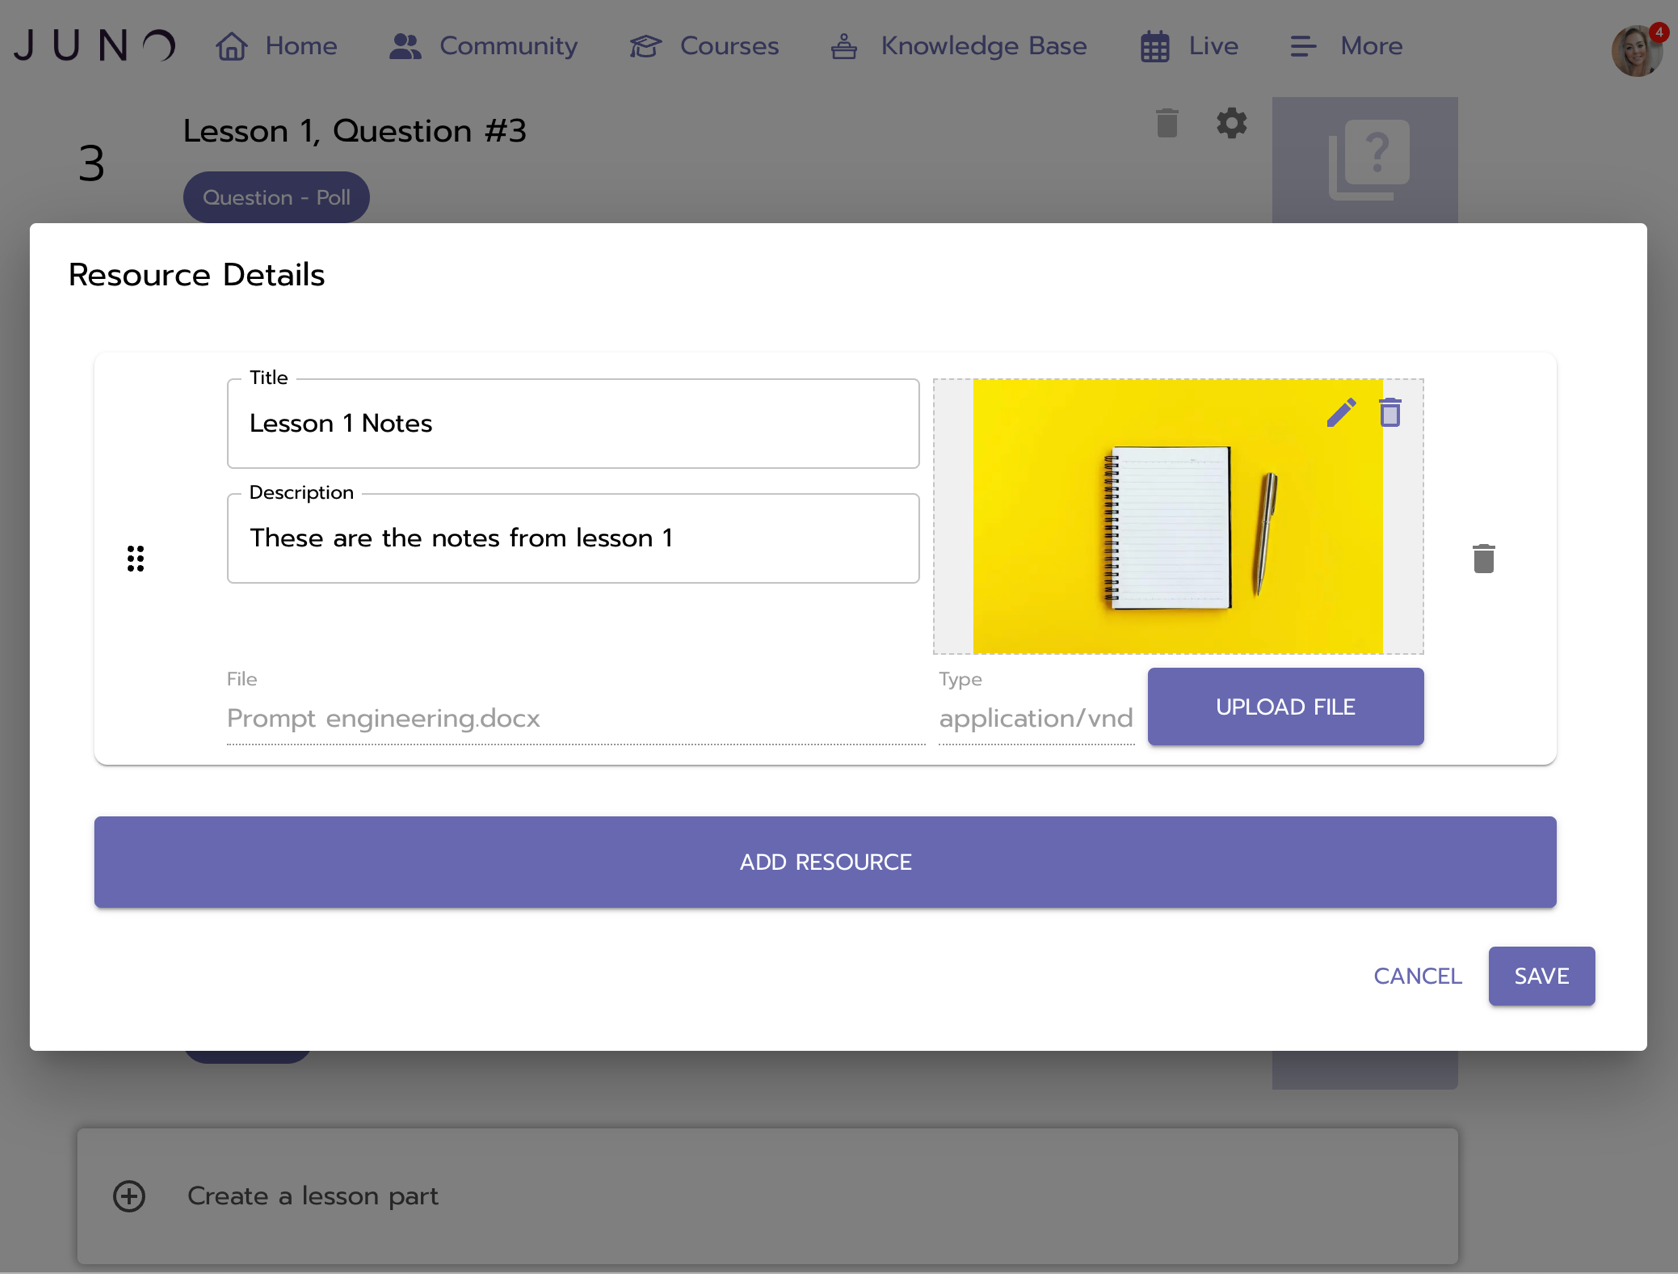
Select Add Resource from the Resource Details window.
Add a Title (67 characters max).
Add a Description (78 characters max).
Select the gray box or click and drag to add a cover Image. Size (w x h): 800 × 450 px
Upload the file.
Select Save.
Adding a Resource to a Lesson.
Managing resources on lessons
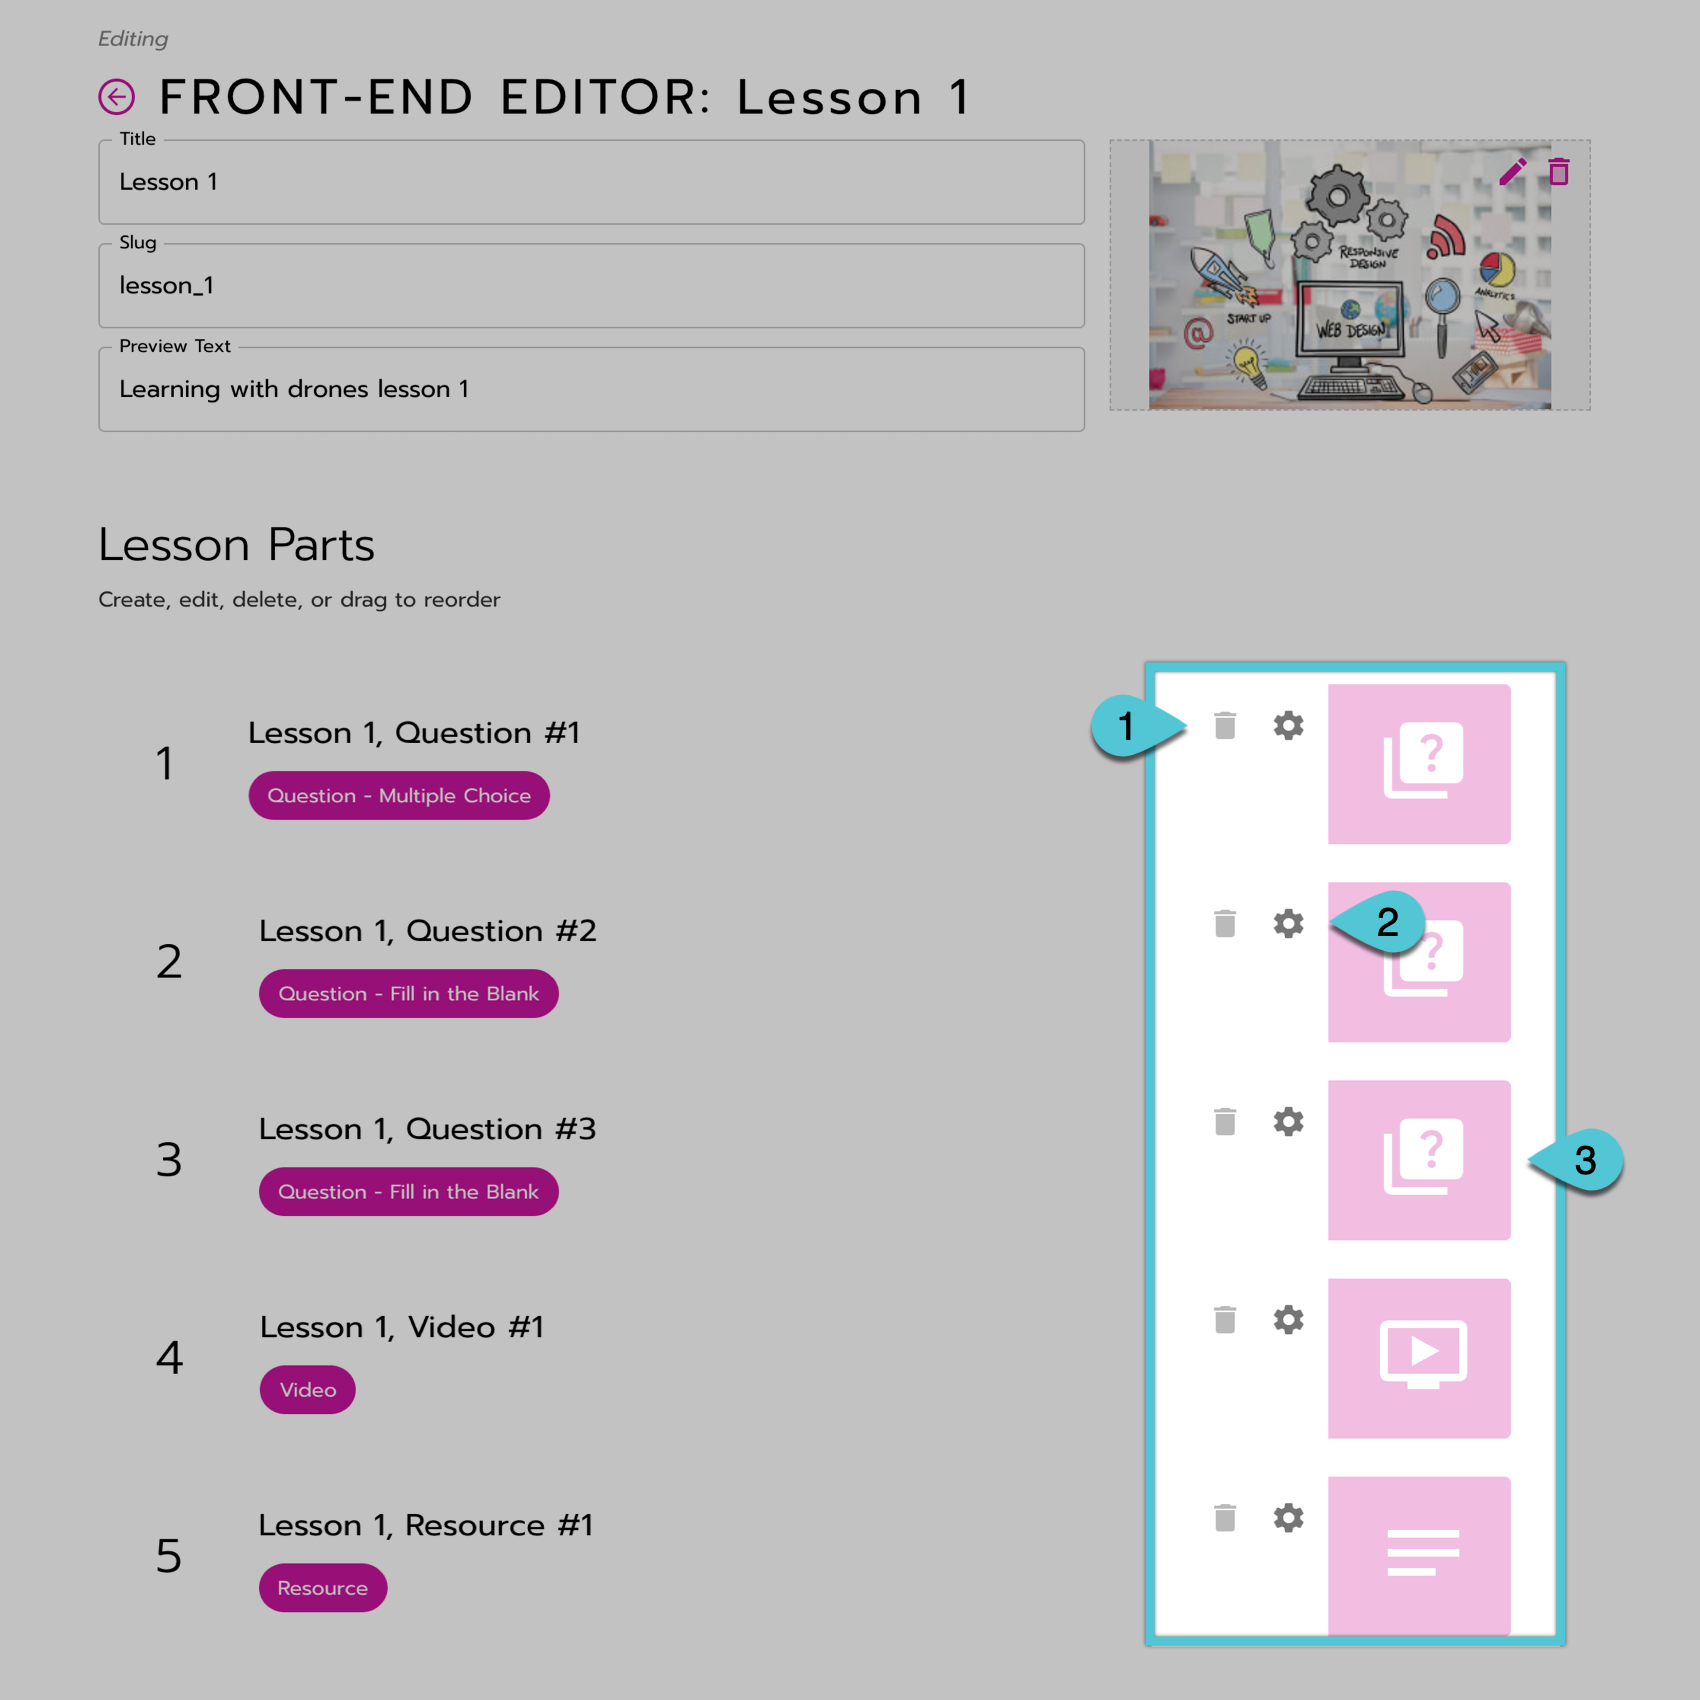
Remove a resource: Select the Trash icon and confirm removal.
Edit Lesson part information: Select the setting cog icon.
Rearrange Lesson parts: Select, drag, and drop to reorder.
Managing Lesson parts.
Allowed file types
Resources should follow these specifications.
Max size: 10 MB.
Allowed file types:
Documents: .pdf, .csv, .xml, .zip, Microsoft Word (.doc, .docx), Microsoft PowerPoint (.ppt, .pptx, .pptm, .ppsx, .ppsm), Microsoft Excel (.xlsx, .xls, .xlsm, .xltm, .xltx, .xlsb), Apple Pages (.pages), Apple Keynote (.key), Adobe Photoshop (.psd), OpenDocument (.odt, .odp), Plain and Rich Text Files (.txt, .rtf)
Resources cannot be web links. We recommend adding links to the content description instead.
We support these major file types, but let us know if you have a different one. Our team will work with you to best support the use of that file type for your platform.
Interacting with resources within lessons
Resources can be in any order within the lesson
Look for a section labeled Resources when one or more are available on a lesson to view and download them.
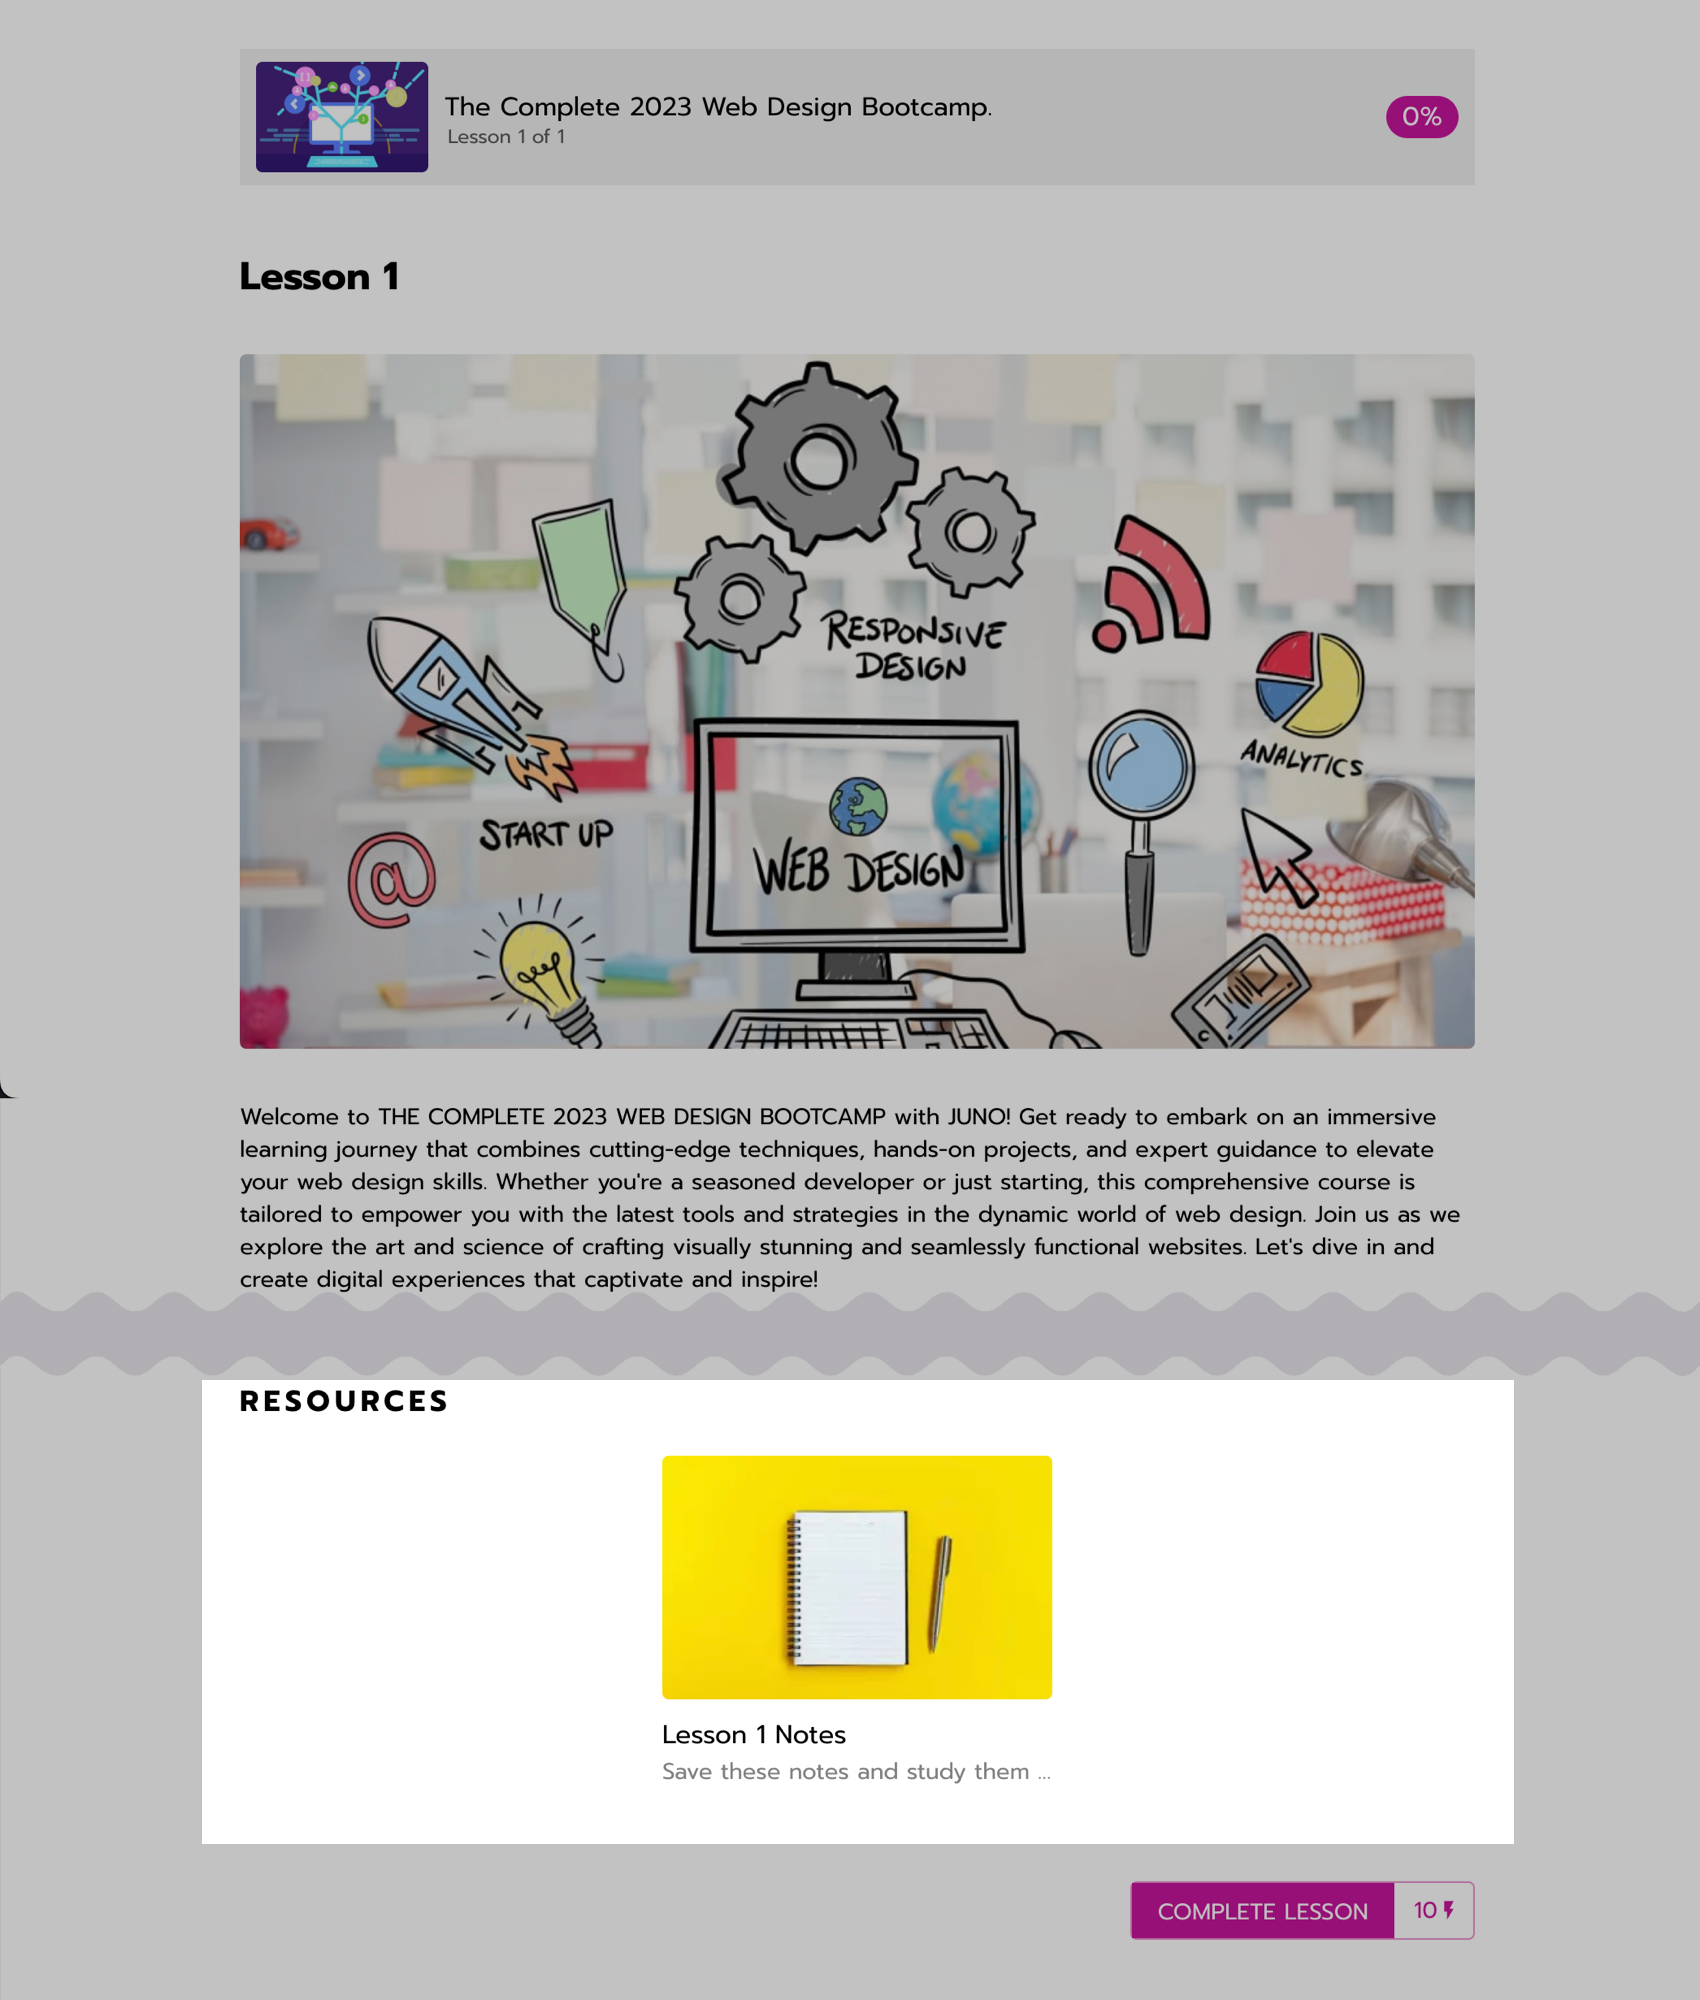
Viewing a resource attached to a lesson.