REUSE - Das admin Automation Tool Settings
This guide will walk you through the step-by-step process of setting up your emailer and branding settings in the Automation Tool.
A note for Site Admins: Full access to Das admin is coming soon! Check back later for updates.
Before you begin the configuration, make sure to choose a Client, a Platform, and a site in Das admin.
Use the left-side navigation within Das admin to select the Automation Tool.
Automation Toolbox Overview
If this is your first visit, two alert boxes will appear, warning you to configure settings before using the Emailer tool.
Each button within the alert boxes navigates you to the correct settings context.
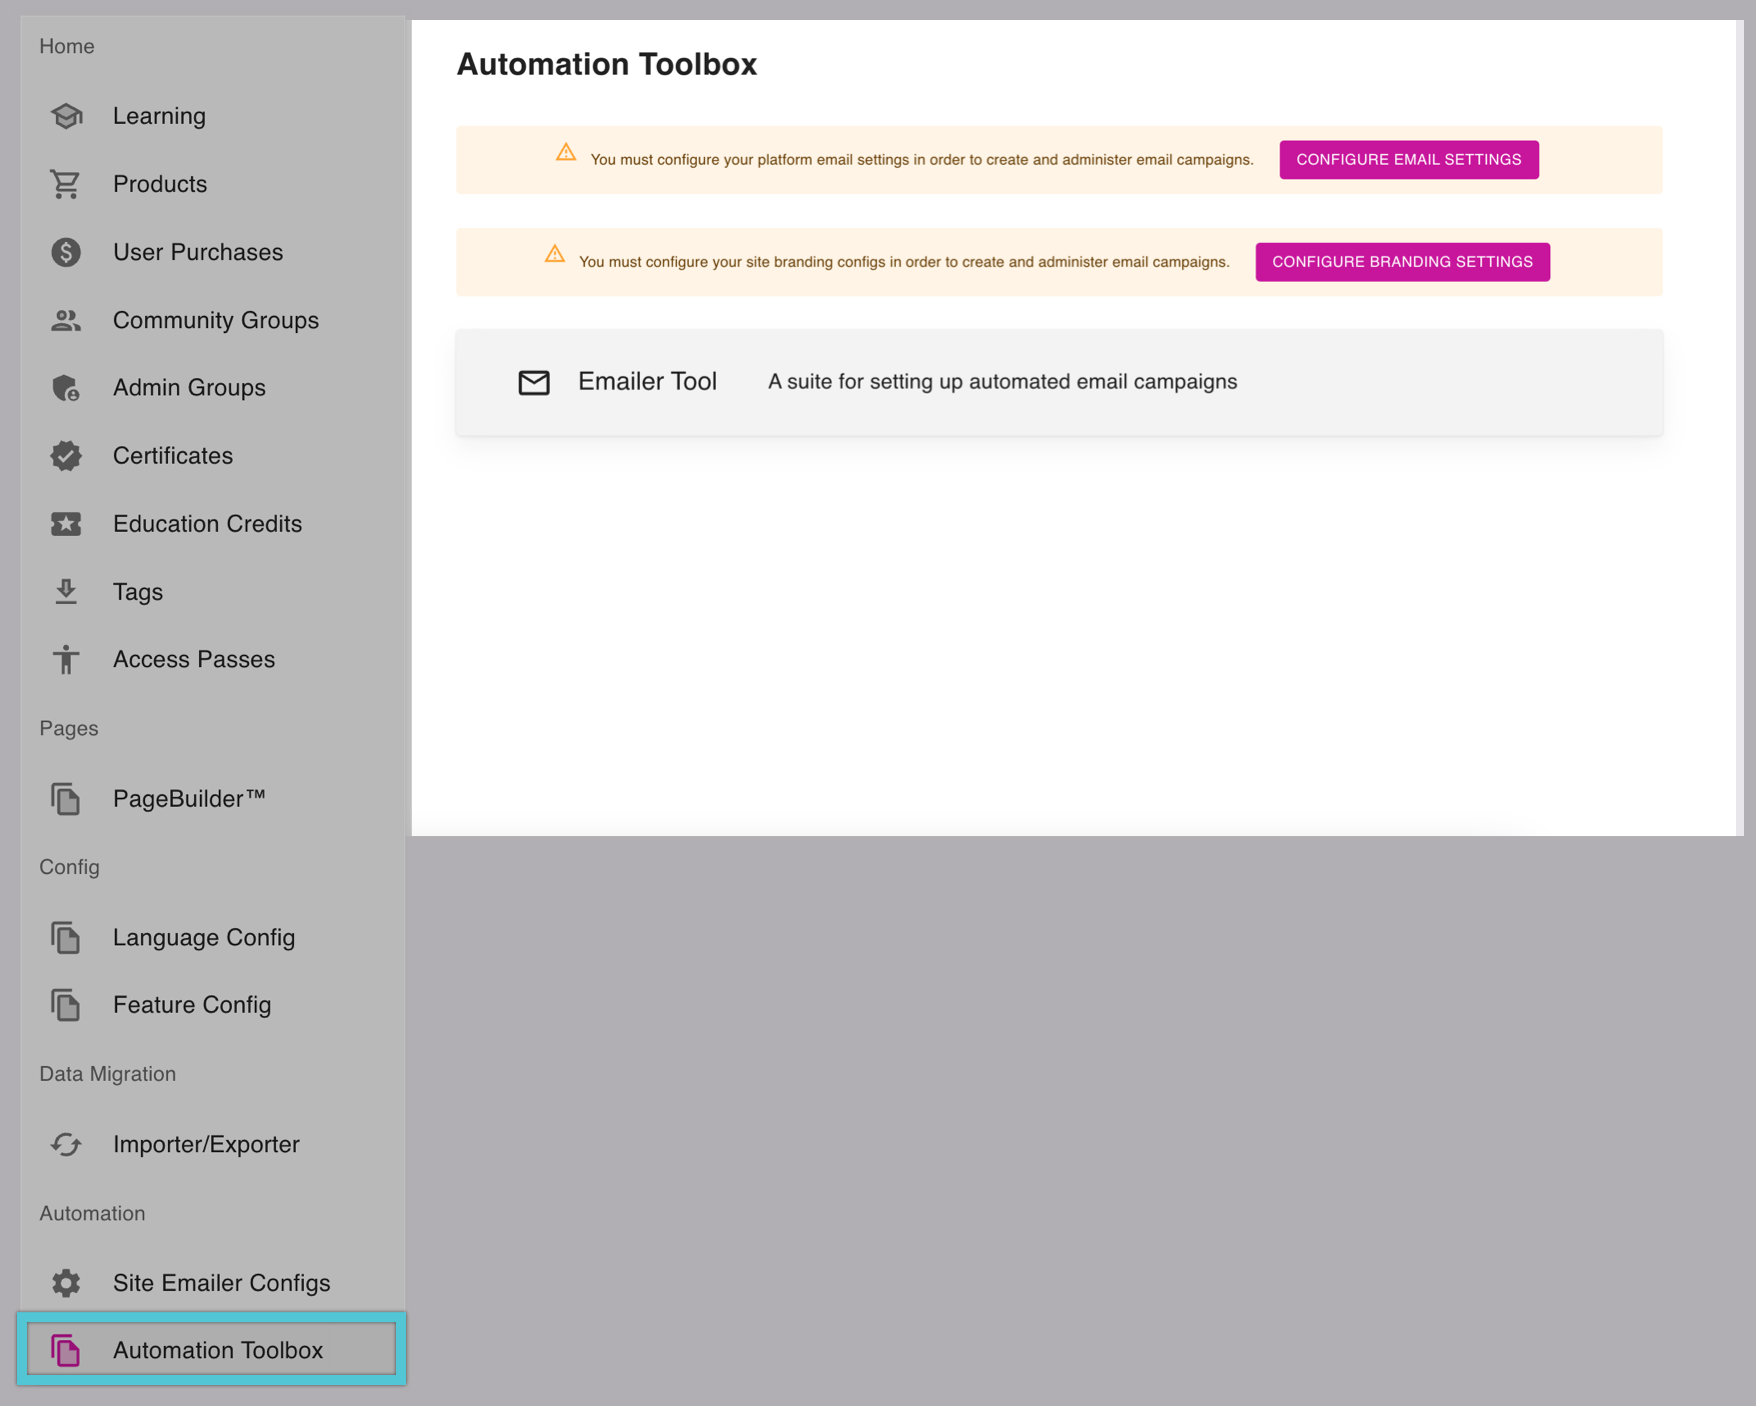
Viewing the Automation toolbox for the first time.
Configure Email Settings
Select the Configure Email Settings button in the first alertbox.
Configure platform-level email settings:
Select the Configure Email Settings button
In the modal, add an Emailer Username.
Select CREATE EMAILER SETTINGS to complete the setup.
A success notification appears for successful Emailer Settings setup.

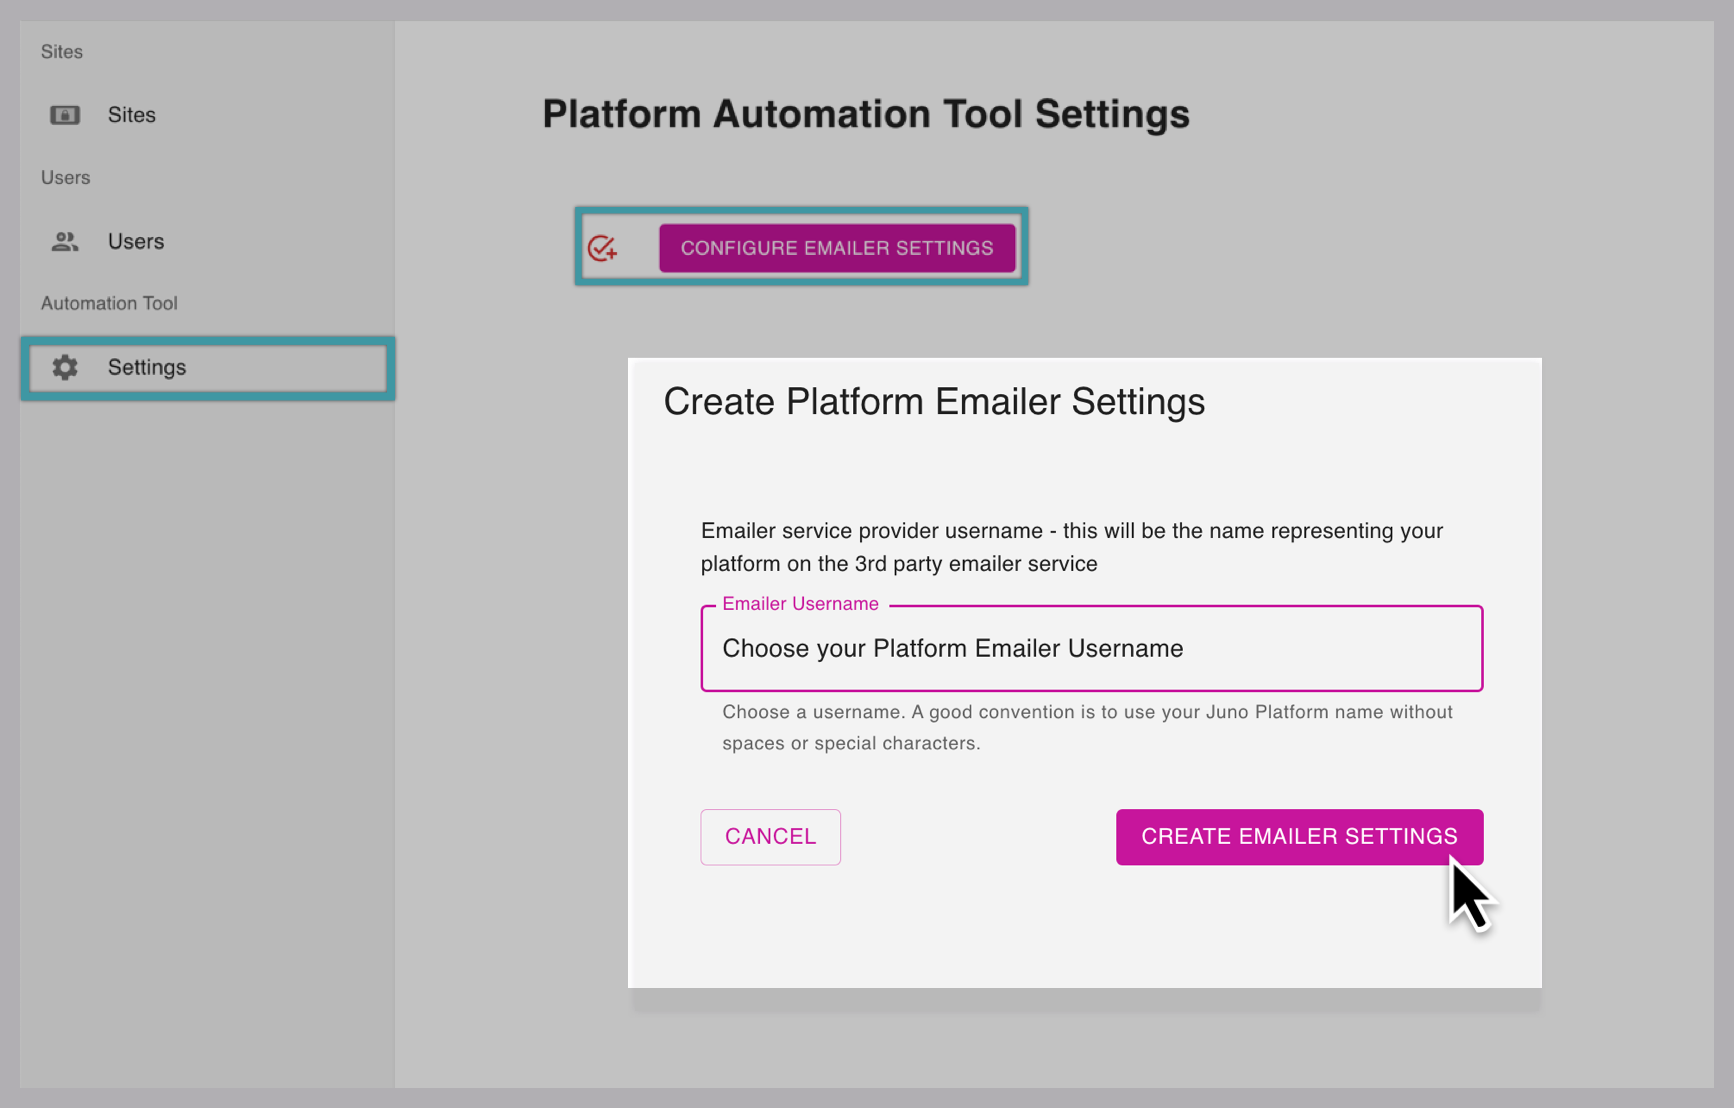
Choosing an emailer username
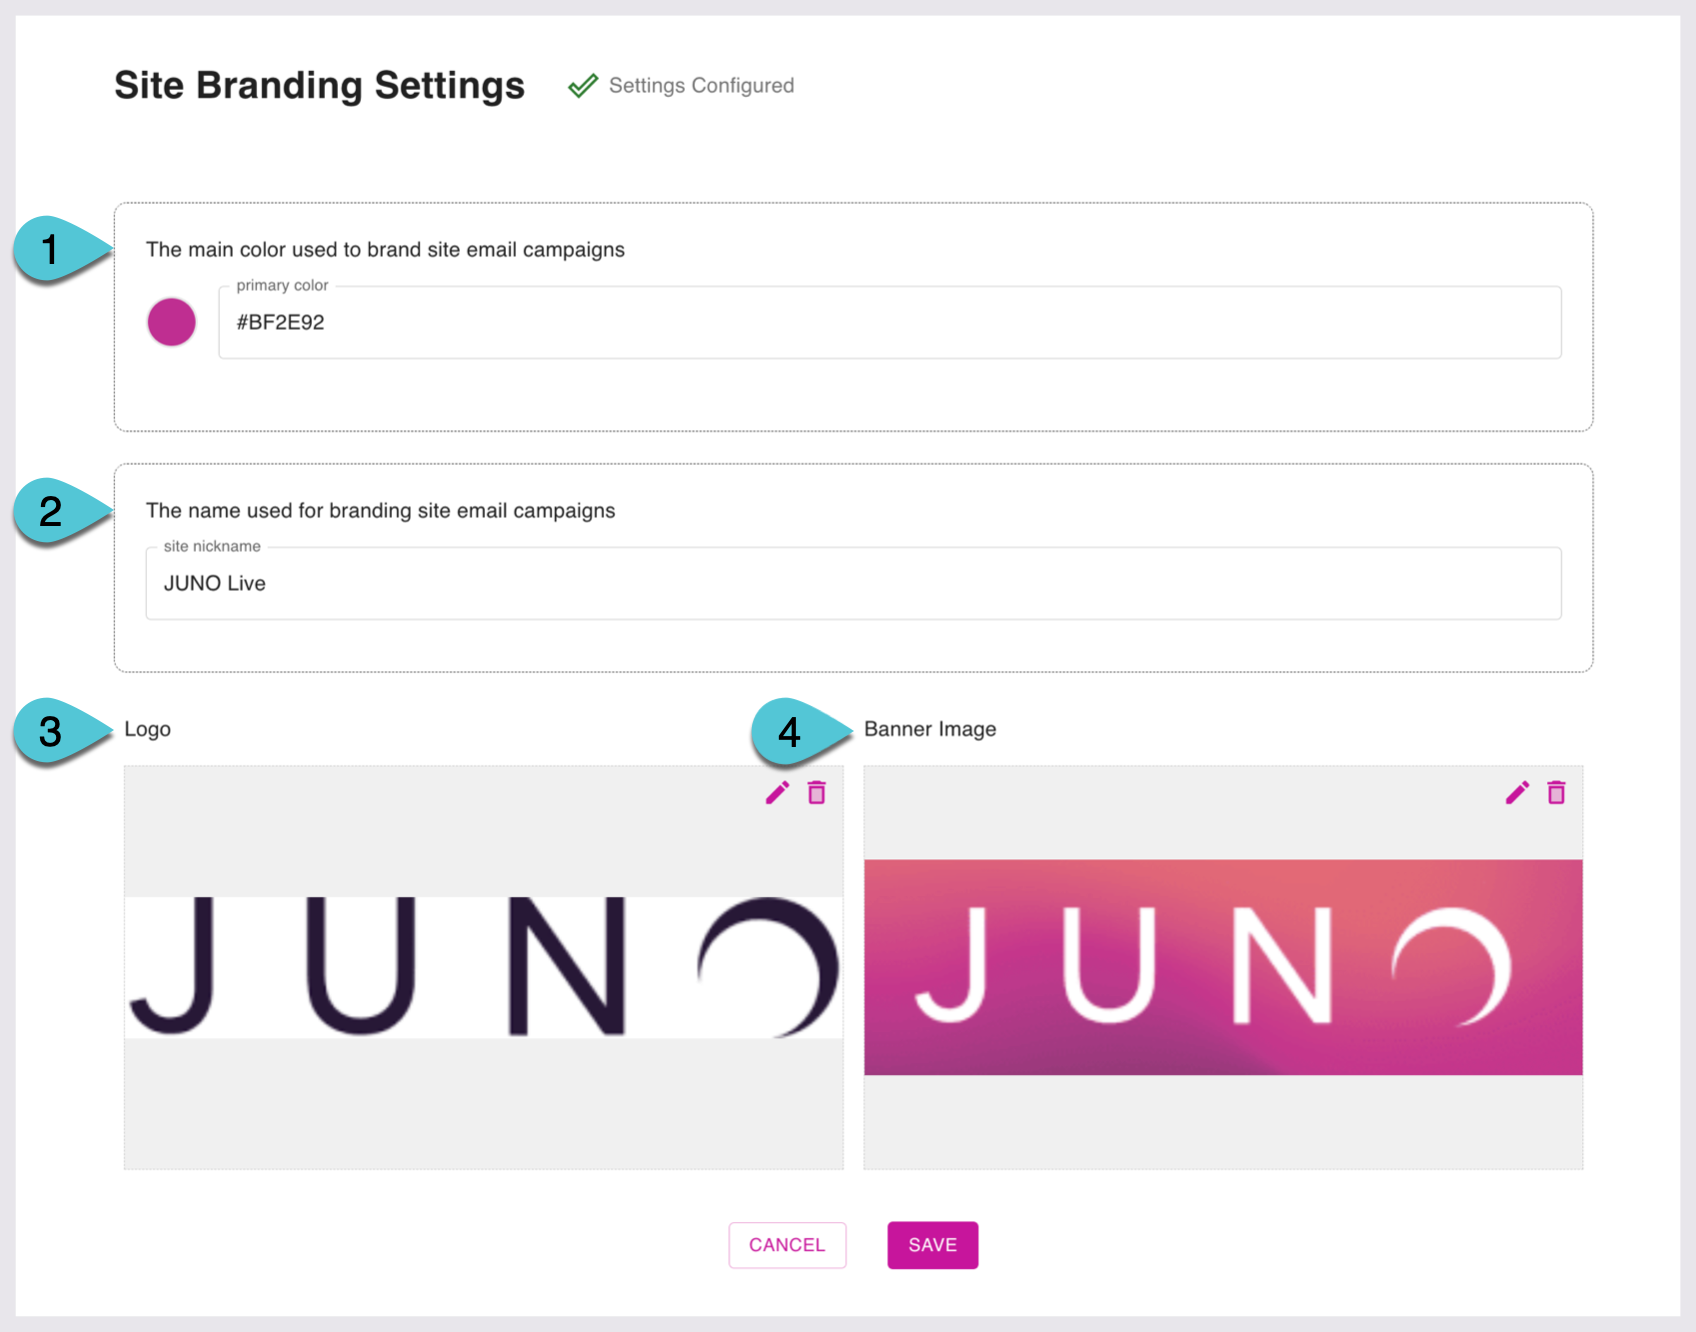
Configure Branding Settings
To navigate back to the Automation tool, use the breadcrumbs at the top of the page.
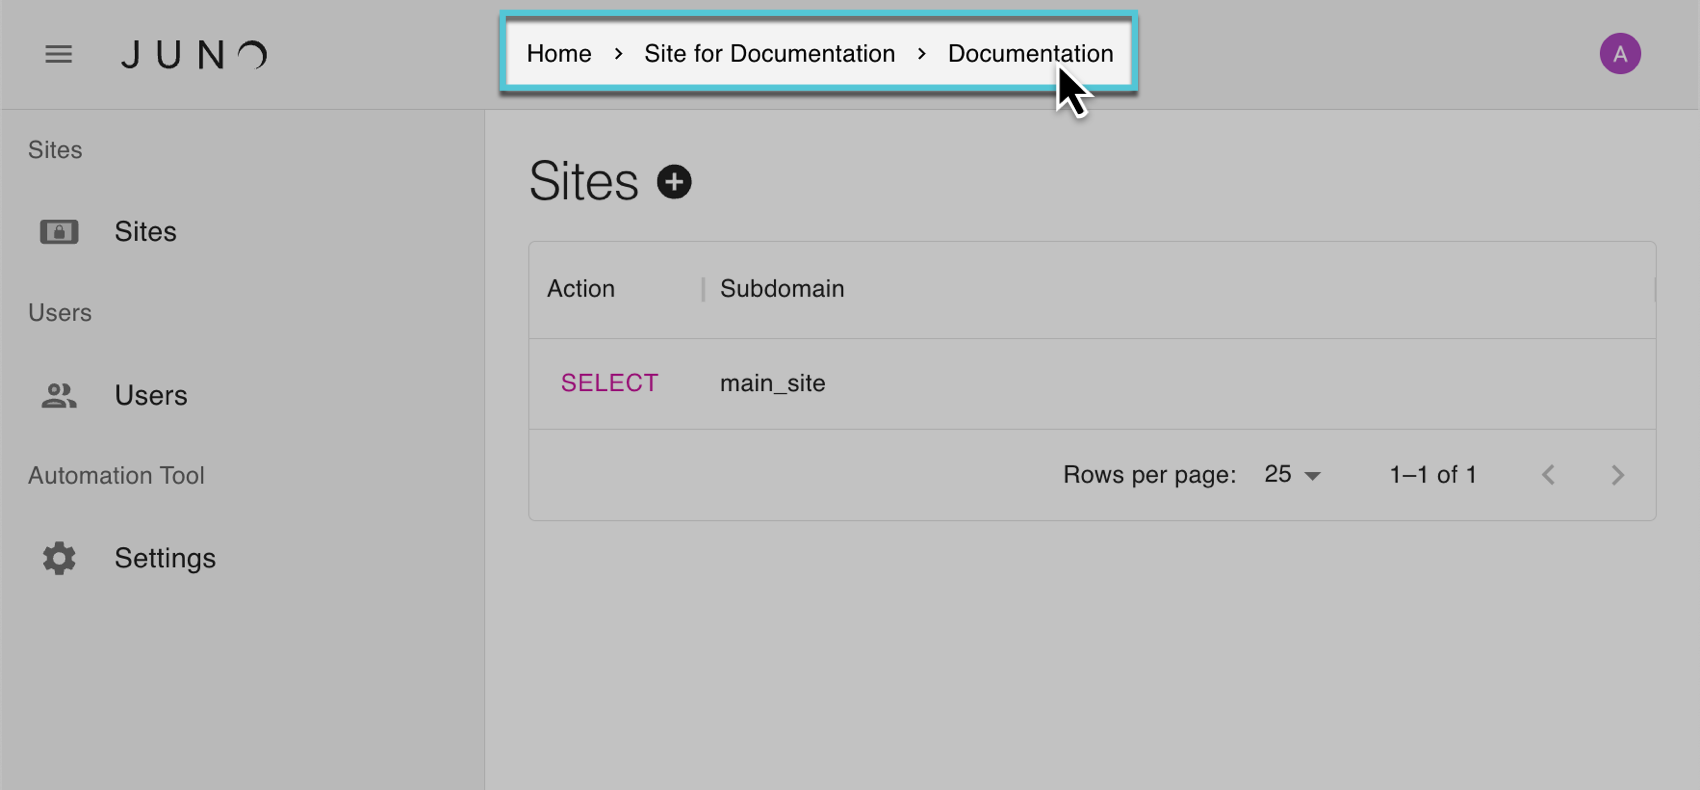
Use the breadcrumbs at the top of the page for navigation.
Configure site-level branding settings:
Select the Configure Branding Settings In the second alertbox.
Enter your brand’s primary color using a color picker or the text box provided (Hex or RGB codes are accepted).
Add a Site nickname.
Click or drag to add a Logo in the Logo Image section.
Accepted file types: png, jpg, jpeg, gif, webp, bmp, svg
Click or drag to a Banner in the Banner Image section.
Accepted file types: png, jpg, jpeg, gif, webp, bmp, svg
Save, or Cancel using the bottom two buttons.
The page prevents the complete removal of site configurations.