Configuring your emailer settings
After completing these steps, please reach out to your Customer Success Manager (CSM) to verify that your Emailer settings are fully configured in Das admin, to enable email campaigns.
This guide will walk you through the step-by-step process of setting up your emailer settings in the Admin dashboard.
Navigation
Navigate to your leading site and select the Admin Dashboard from the More menu.
In the Admin Dashboard, select the Automation tool from the Left-side Navigation.
Automation Toolbox Overview
If it's your first visit, an alert box will appear, advising you to configure your email settings before using the emailer tool.
Configuring the email settings
Select the Configure Email Settings button in the alert.

The configure email settings alert
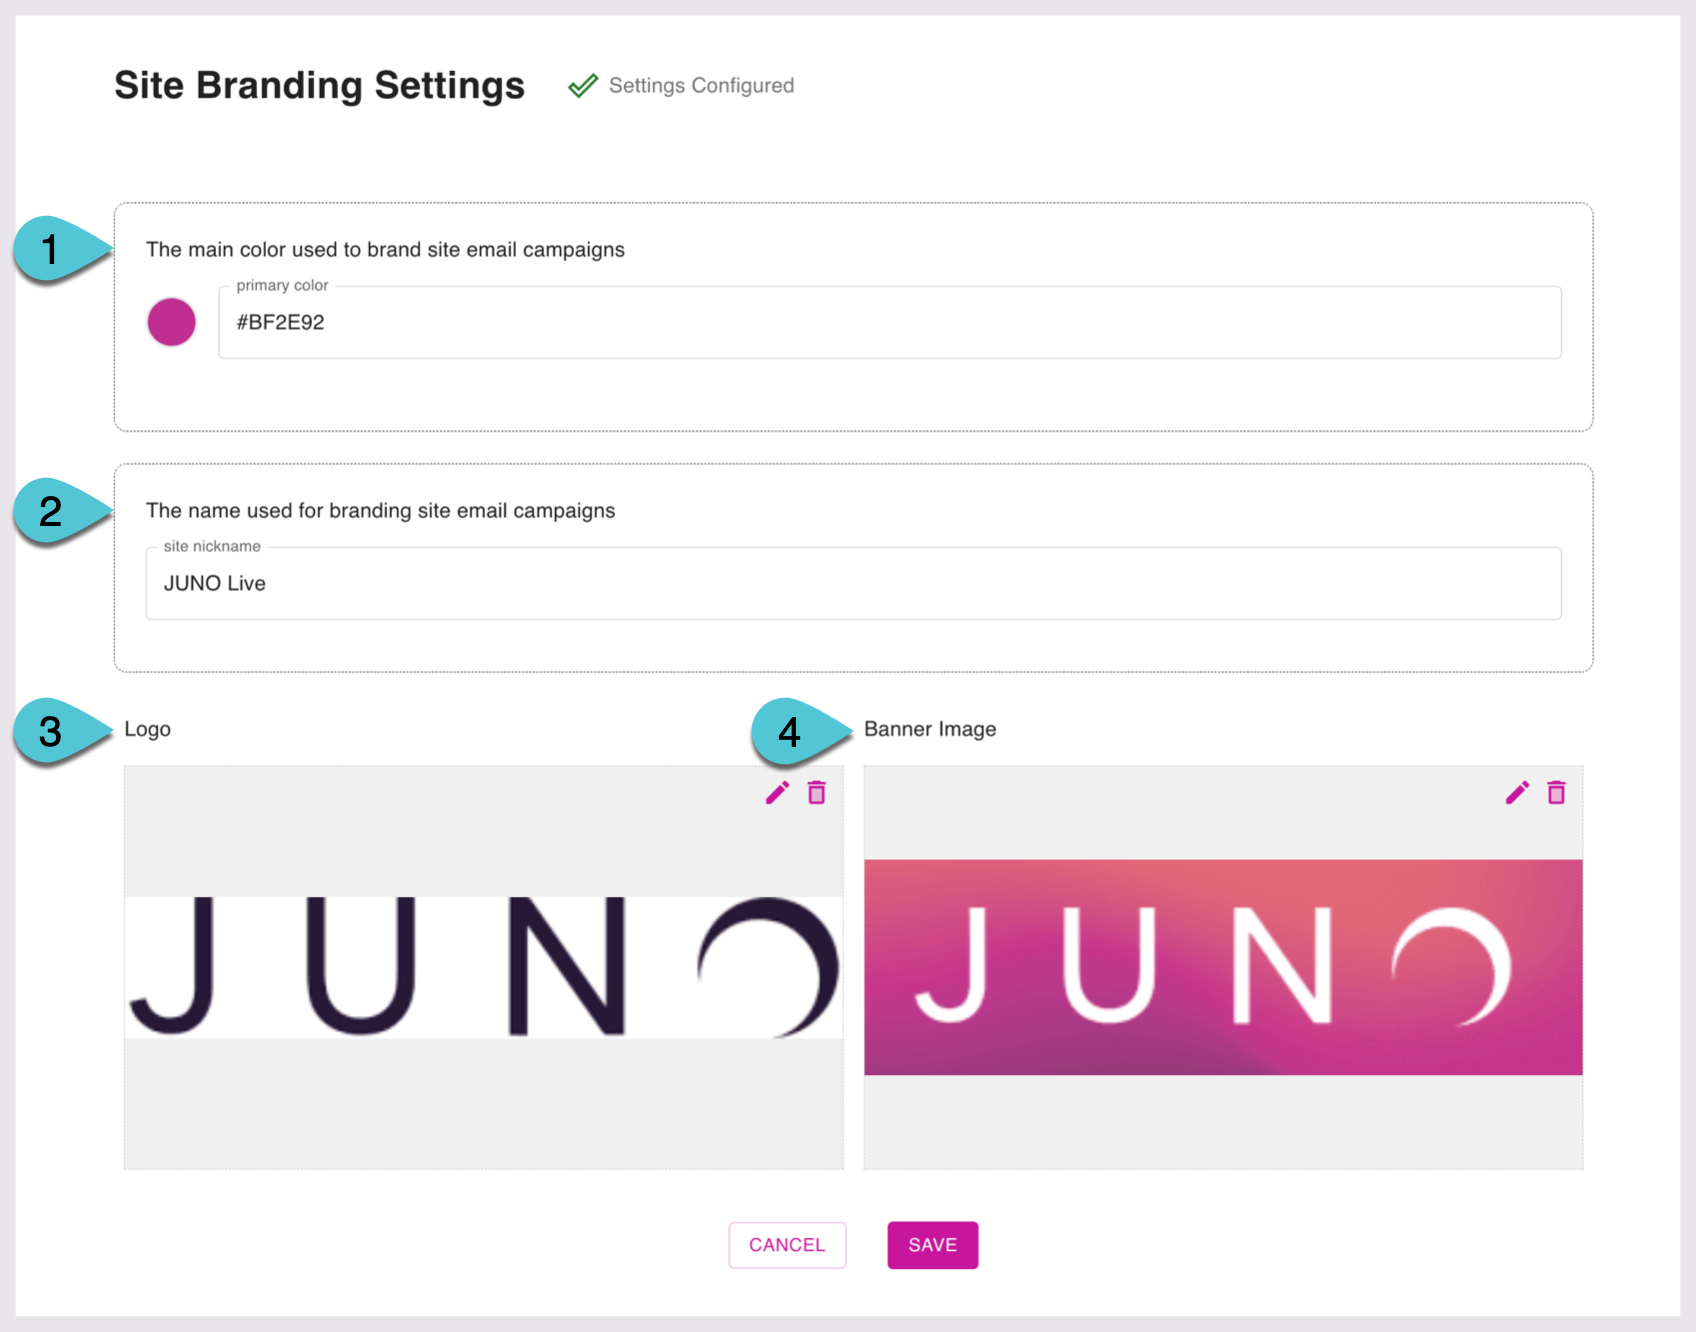
Enter your brand’s primary color using a color picker or the text box provided (Only Hex codes are accepted).
Having trouble finding your HEX code? Contact your CSM for help.
Add a Site nickname.
Click or drag to add a Logo in the Logo Image section.
Accepted file types: png, jpg, jpeg, gif, webp, bmp, svg
Click or drag to a Banner in the Banner Image section.
Accepted file types: png, jpg, jpeg, gif, webp, bmp, svg
Save, or Cancel using the bottom two buttons.
Once site configurations have been set up, the page does not allow for their complete removal.

